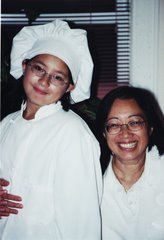
Jonathan Weisbach; doesn't he look great in his chef's jacket?

We got down to the nitty gritty today; we made chicken stock and vegetable soup. There's a whole lot of chopping, dicing, cutting and snipping. In the end, it was all worth it because the soup was delicious. There is something about soup made from all the basic ingredients that makes you feel as though you are "mainlining" vitamins and all things good for you, at least it's that way for me.
First, the stock
Here we took a passel of chicken bones that were left from deboning chicken breasts, thighs and other parts. You could also use necks, backs and wings; it all adds to the flavor of the stock. You should wash the parts in cold water and place them in the deep stock pot; add cold water and heat over high heat until it begins to boil, then bring it down to a simmer. The pot should NEVER boil; it must simmer for hours to develop the best flavor.
 After it approached a boil, I skimmed the scum off the top, then we added chopped onions, carrots, a boquet garni(a bundle of herbs) and celery. I found out later in the day that the stock we make today will be used in a dish that we prepare tomorrow...stay tuned!
Now, the soup...
We slice and diced carrots, celery and onions and sweated them in a deep soup pot ( a little less deep than a stock pot) once that was accomplished we used an already prepared stock to simmer them for a while. We added enough stock just to cover the veggies that were just added.

After a while we added more veggies, Chinese cabbage, potatoes, corn, butter beans, chopped and seeded tomatoes, and string beans.


We added more stock and let it simmer for another hour or two and before you know it...we had great tasting soup!
 A rustic apple tart was next on the agenda, we took the dry ingredients and pulsed them in the food processor with the butter and shortening until we got pea sized lumps
 and the dough held together a little when gently pressed together with your fingers.
 Once that consistency is obtained we formed the dough into an oblong block pressing just enough to hold it together and then saran wrapped it and placed it back into the fridge. See, the secret to a tender and flaky crust is keep all your ingredients icy cold until it goes into the oven. They stayed cooling for an hour or so while we busied ourselves with other exciting food items...
 If you look real close you may see the little bits of yellow butter in the dough...this is key to getting a flaky crust. Oh, I guess by now you realize that if you are watching your fat intake, maybe this is NOT the recipe for you!
 We thinly sliced three granny smith apples and tossed the slices in a pot with orange juice, brown sugar, cinnamon and nutmeg.
 Once the dough was re-chilled, we rolled it on right on the parchment paper and the baking sheet that would go in the oven; this helped a lot in keeping the final shape of the tart in place without tearing it by trying to move it from the board to the baking sheet.
 Place the apples in the center of the rolled dough, sprinkle with the crumb mixture that we made earlier...keeping everything about an inch from the edges of the dough.
Then, as if by magic, bring up the edges of the tart and push to the side and keep up that action all the way around the tart until you get something that looks like this

Brush the edges with egg white wash and put it in the oven for about40 minutes or until it looks like this. We also made Ice Cream at the onset of the day, which we served with the tart. It was heavenly.
 Now we started to get into the "meat" of our cooking...
To make Sauteed breast of chicken stuffed with fresh herbs and mozzarella, you must first butterfly the chicken breast.
See, first remove any fat or grizzle and then, from the skin side up, slice horizontally gently until you get almost to the other side


 When you're done it looks almost like a heart shape
 Place the cheese and herbs on one side and fold the other side over them
 dredge the chicken in seasoned flour and place in the fridge for a while for the flavors to meld. Then lightly oil a pan, heat it up and add the chicken, turning occasionally until both side are browned, put in the oven to finish cooking.
 Next up, Mustard and herb-glazed pork tenderloins. Here we made the glaze using whole seed country mustard, apricot jam, herbs, honey and salt and pepper
The tenderloins need to clean of any remnants of skin and fat and then tied so the entire tenderloin is uniform in shape for even cooking
 Jonathan shows us how to tie the tenderloin using only one length of string...he makes it look so easy!
 we oiled the tenderloins and seasoned them before placing them in the hot pan to sear on all sides. Don't round things have sides? Well, seared all around then,)
 Once they were browned, we brushed the glaze on them and place them in the oven on a rack so the heat could circulate all around the meat.
 Almost done...here we are looking for an internal temperature of 145 degrees.
 We made a pan au jus with with the frond by pouring in a little stock and deglazing the pan; then cooking the liquid down by 50 percent. We added some herbs and the sauce was magnificent without any fats or starches!
We drizzled it over the finished pork tenderloins....AHhhhhh!
 Here is the finished product
We also made oven roasted fall vegetables. Here is a butternut squash about to meet its maker
 We chopped onions, shallots, sweet potatoes, summer squash and the butternut squash; sprinkled herbs and oil to coat.
 Then turned the bowl onto preheated baking sheets covered with foil for easy clean up and no sticking!
 Okay, looks like it is time for lunch
Today we had two kinds of wine, I opted for the pinot noir...very nice
 Here is the completed chicken, roasted veggies and some angle hair that we also made.
 I had already started my plate when the tenderloin was sliced so added more food and got another shot
 Here is the cinnamon ice cream (and butter pecan) that we made first thing this morning sittng right next to our beautiful apple tart.


No comments:
Post a Comment